

Eco-Friendly Elegance: DIY Hanging Plant Drip Tray from Thrifted Finds
This post may contain affiliate links, meaning I get a commission if you decide to make a purchase through my links, at no cost to you. As an Amazon Associate, I earn from qualifying purchases.DIY Hanging Plant Drip Tray
Watering hanging plants can be a logistical nightmare, often resulting in drips and messes below. Instead of buying expensive alternatives, why not embrace a sustainable, DIY approach?
In this blog post, we'll show you how to create a stylish and practical hanging plant drip tray using a thrifted plate, a plate hanger, and hanging chains. This method not only solves the watering dilemma but also gives new life to a repurposed item, blending functionality with eco-friendly creativity. Join us as we craft a perfect solution for your indoor garden!
Step 1: Pick Your Plate

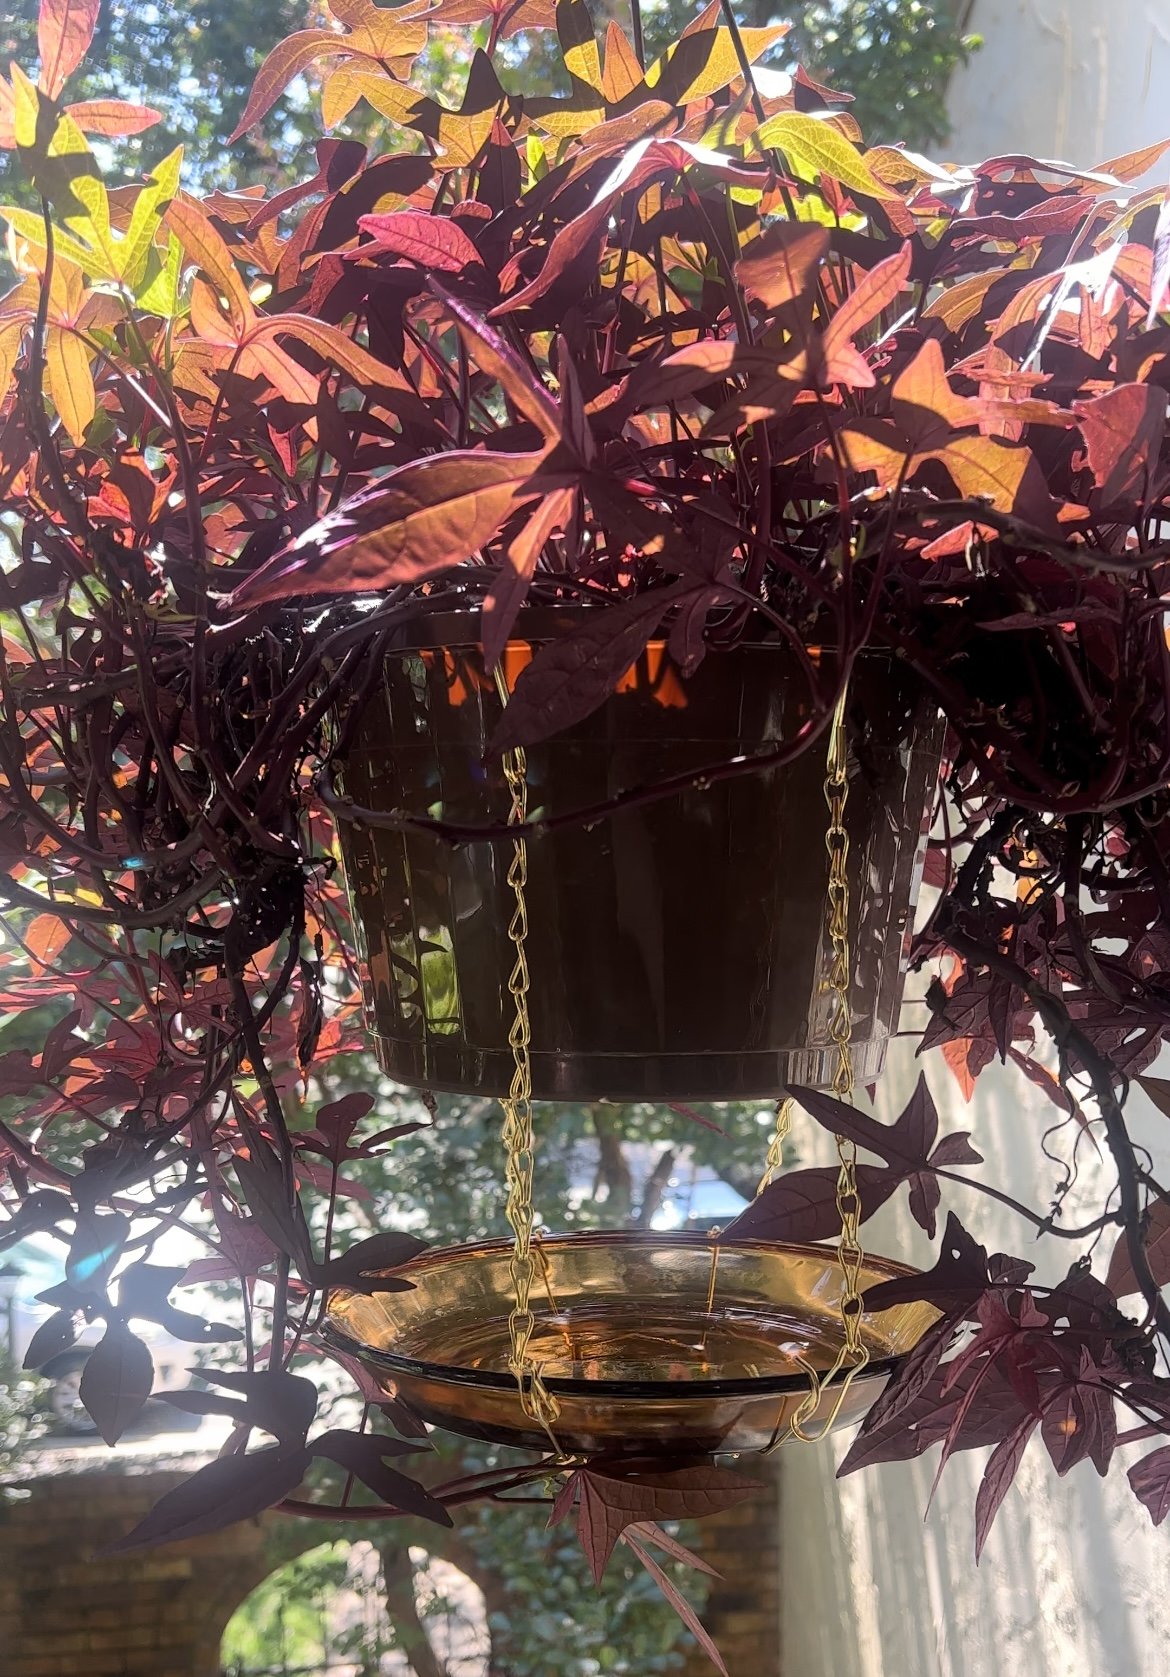
I chose to use this stunning amber plate for my drip tray, but any glass or thick plastic plate should work. Depending on the size of your hanging plants, I found that 6-8” plates work best!
Step 2: Get Your Supplies


Other than the plate, you will only need two other items to complete this project; a plate hanger, and 10-inch hanging chains.
Plate Hanger
Here is a plate hanger on Amazon that fits 8-11” plates. I went with a gold color as that fits my aesthetic the best, however there are plenty of options if gold isn’t your thing!
Pro Tip: Make sure to measure your plate and get a hanger that fits, my first attempt I used a plate hanger that was a little snug and almost took my eye out!
10-Inch Hanging Chains
Here are the hanging chains that I used. These chains already have the hooks and clips you need to secure it to the plate hanger and the gold color perfectly matches!
***Some of these products may also be available at your local home improvement store!Step 3: Plate in Plate Hanger

This was probably the longest process of this project. Place one side of the plate hanger on one side of your plate, then stretch the plate hanger over to the other side.
Make sure the plate hanger is centered and secure. Before attaching your chains, be sure the plate doesn’t slide around or have any wiggle room as this could lead to the plate to fall out, or the hanger to become loose, resulting in broken glass and heartbreak!
Step 4: Attach Your Chains

Using the side of your chains with the clips, clip each chain onto the hooks of the plate hanger. Once attached, they should be able to hold the plate and hanger without any of the hooks coming loose.
Step 5: Pick Your Plant

Using the hooks on the chains, hang the drip tray on the sides of your hanging plant. Because of this design, you should be able to attach and remove with ease, using the same drip tray for all of your hanging plants!
Step 6: Water and Enjoy!

The only thing left is water, sit back, and not worry about your plants dripping a mess all over the place! When you’re done watering you can simply dump the run-off out and continue your plant chores in peace.
Congratulations on crafting your very own hanging plant drip tray! Not only have you created a practical solution for watering your hanging plants, but you've also embraced a sustainable approach by repurposing thrifted items.
This DIY project blends functionality with eco-conscious creativity, proving that stylish and effective plant care doesn't have to come at a high cost or environmental impact. Enjoy the convenience and charm of your new drip tray, and take pride in your contribution to a greener home. Happy planting!